
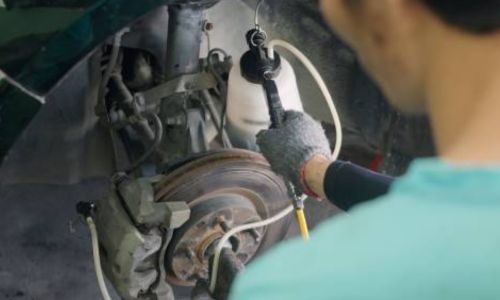
Introduction: Learning how to bleed your brakes is essential for any vehicle owner or enthusiast. Bleeding your brakes ensures that your braking system operates at its best, providing you with the confidence and safety you need on the road. This comprehensive guide will walk you through bleeding your brakes independently, empowering you to maintain and optimize your vehicle’s braking performance. Whether you’re a seasoned mechanic or a novice DIYer, mastering this procedure will enhance your understanding of your vehicle’s mechanics and keep you safe on your journeys. Understanding Brake Bleeding: Before diving into the procedure, let’s understand why bleeding your brakes is necessary. Over time, air can accumulate in your brake lines, compromising the efficiency of your braking system. This air creates sponginess in the brake pedal and reduces the effectiveness of your brakes. You remove air bubbles from the brake lines by bleeding the brakes, restoring proper hydraulic pressure, and ensuring responsive braking. Tools and Materials Needed: To bleed your brakes effectively, you’ll need the following tools and materials: Jack and Jack stands Lug wrench Brake fluid (recommended type for your vehicle) Clear plastic tubing Box-end wrench or flare nut wrench Brake bleeder kit (optional but recommended) Clean cloth or towel Step 1: Prepare Your Vehicle Start by parking your vehicle on a level surface and engaging the parking brake. Use a lug wrench to loosen the nuts on all four wheels, but do not remove them completely. Then, lift the vehicle using a jack and secure it with jack stands for safety. Step 2: Locate the Brake Bleeder Valve. Each wheel on your vehicle will have a brake caliper or wheel cylinder with a bleeder valve. The bleeder valve is typically a small, hexagonal fitting on the back of the caliper or cylinder. Step 3: Prepare the Bleeding Setup. Attach a clear plastic tubing to the bleeder valve, ensuring a tight connection. Place the other end of the tubing into a container filled with brake fluid. The fluid will prevent air from being drawn back into the brake lines during bleeding. Step 4: Bleed the Brakes. Starting with the wheel farthest from the master cylinder (usually the right rear wheel), have a helper sit in the driver’s seat. Instruct them to pump the brake pedal several times and then hold it down firmly. Loosen the bleeder valve half a turn using a box-end or flare nut wrench. You’ll see brake fluid and air bubbles flowing through the tubing. Tighten the valve before the pedal reaches the floor, then instruct your helper to release the brake pedal slowly. The automotive braking systems market size was 578.5 million units in 2023. The market will grow at a CAGR of more than 1% from 2023 to 2028. Repeat this process several times until clear, bubble-free fluid flows through the tubing. Check the brake fluid reservoir periodically and top it off as needed to prevent air from entering the master cylinder. Step 5: Move to the Next Wheel Once you’ve finished bleeding the first wheel, move on to the next wheel in the sequence (usually the left rear wheel). Repeat the bleeding process, working your way from the farthest wheel to the closest wheel to the master cylinder (right rear, left rear, right front, left front). Step 6: Check for Leaks and Top Off Brake Fluid. After bleeding all four wheels, carefully inspect the brake calipers and wheel cylinders for any signs of leaks. Tighten any fittings as needed to prevent leaks. Then, top off the brake fluid reservoir to the proper level and securely replace the cap. Step 7: Test Your Brakes Lower your vehicle from the jack stands and remove the jack. When the engine runs, pump the brake pedal several times to ensure it feels firm and responsive. Test your brakes by driving at low speeds and gradually applying them to ensure they function properly. Conclusion: Bleeding your brakes is a necessary maintenance task that helps ensure your vehicle’s safety and performance. By following the steps outlined in this guide, you can effectively remove air from your brake lines and restore optimal braking efficiency. Remember to exercise caution and follow proper safety procedures throughout the process. With practice, you’ll become confident in your ability to bleed your brakes and keep your vehicle running smoothly for miles. Visit Phoenix Windshield Repairs for detailed vehicle maintenance and repair guidance, including tips on bleeding your brakes and other essential tasks. With their expertise and resources, you can confidently tackle automotive challenges and keep your vehicle in top condition. FAQs about Bleed Your Brakes Q1: What type of brake fluid should I use? The type of brake fluid you should use depends on your vehicle’s specifications, typically found in the owner’s manual or service guide. It’s crucial to use the recommended type of brake fluid to ensure compatibility and optimal performance. Q2: What should I do if I encounter resistance when loosening the bleeder valve? Do not force it, as it could damage the valve or brake components. Instead, apply penetrating oil to the bleeder valve and allow it to soak for a few minutes before attempting to loosen it again. If the valve remains stuck, seek professional assistance. Q3: How do I know when I’ve successfully bled my brakes? You’ll know you’ve successfully bled your brakes when you see clear, bubble-free fluid flowing through the plastic tubing attached to the bleeder valve. Additionally, the brake pedal should feel firm and responsive when depressed. Q4: What should I do if I accidentally spill brake fluid? Brake fluid is corrosive and can damage paint and certain materials, so cleaning up any spills immediately is essential. Use water to dilute the spilled brake fluid and clean the area with a cloth. Avoid letting brake fluid contact your skin or eyes, and dispose of any contaminated materials properly. Q5: Is there a specific sequence for bleeding the brakes? It’s recommended to bleed the brakes starting from the wheel farthest from the master cylinder and working your way