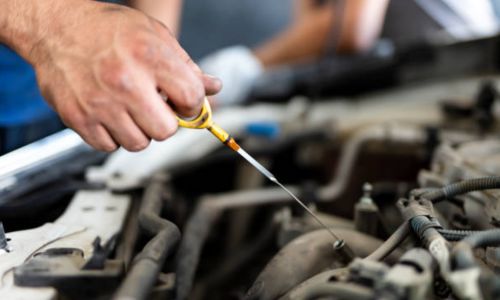
Regularly checking the oil in your car is essential for maintaining your engine’s health and longevity. The process is simple yet crucial for ensuring your vehicle runs smoothly. In this comprehensive guide, we’ll walk you through each step to check the oil in your car, providing easy-to-understand instructions that anyone can follow. The global automotive engine oil market size was valued at USD 36.49 billion in 2018 and is projected to reach USD 45.66 billion by 2026. Source. Why Checking Your Car’s Oil is Important Checking your car’s oil is one of the most important maintenance tasks. Engine oil lubricates the moving parts, reduces friction, and helps keep the engine cool. Without enough oil or with dirty oil, your engine could overheat, parts could wear out prematurely, and you could end up facing costly repairs. By checking the oil regularly, you can catch any potential issues early and ensure your car remains in good running condition. When to Check Your Car’s Oil It’s generally recommended to check your car’s oil at least once a month. However, you should also check it before long trips or if you notice any signs of oil trouble, such as oil spots under your car, the oil pressure warning light coming on, or unusual engine noises. Regular checks can prevent small issues from becoming major problems. Tools You’ll Need Before you begin, gather the following tools: A clean rag or paper towel Gloves (optional, but useful for keeping your hands clean) These basic tools will help you perform the oil check quickly and efficiently. Steps to Check Oil in a Car Step 1: Park Your Car on a Level Surface First, ensure your car is parked on a flat, level surface. This is important because the oil reading may be inaccurate if the vehicle is on an incline. Turn off the engine and let it cool down for a few minutes if it has been running. This allows the oil to settle in the pan, giving you a more accurate reading. Step 2: Open the Hood Next, open the hood of your car. This is typically done by pulling the hood release lever inside the vehicle, usually near the driver’s seat. Once you’ve pulled the lever, go to the front of the car and locate the hood latch. Release the latch and lift the hood. Use the hood prop to keep it open if necessary. Step 3: Locate the Dipstick The dipstick is a long metal rod that extends into the oil reservoir. It usually has a brightly coloured handle, making it easy to find. In most cars, the dipstick is located near the front of the engine. If you have trouble locating it, refer to your car’s owner’s manual. Step 4: Pull Out the Dipstick Carefully pull the dipstick out of its tube. Have your rag or paper towel ready, as the dipstick will have oil on it. Wipe the dipstick clean with the rag or paper towel. This will allow you to get an accurate reading when you reinsert it. Step 5: Reinsert the Dipstick After wiping it clean, reinsert the dipstick fully back into its tube. Make sure it goes all the way in to get an accurate measurement. Once it’s fully inserted, pull it out again to check the oil level. Step 6: Check the Oil Level Look at the end of the dipstick. You will see markings indicating the oil level range, usually labelled with “MIN” and “MAX” or similar indicators. The oil level should be between these two marks. You need to add oil if the oil is below the minimum mark. If it’s above the maximum mark, there may be too much oil, which can cause problems. Step 7: Check the Oil Condition Besides checking the level, the condition of the oil must also be looked at. Fresh oil is typically amber and clear. If the oil is dark, dirty, or has metal particles, it might be time for an oil change. Additionally, if the oil appears milky, it could indicate a coolant leak into the engine, which requires immediate attention. Step 8: Add Oil if Necessary If your oil level is low, you will need to add more oil. First, ensure you have the correct type of oil for your car. This information can be found in your car’s owner’s manual. To add oil, locate the oil filler cap, usually marked with an oil can symbol. Remove the cap and use a funnel to pour in the oil. Add a little at a time and recheck the level with the dipstick to avoid overfilling. Step 9: Recheck the Oil Level After adding oil, please wait a few minutes to let it settle, then reinsert the dipstick and check the level again. Repeat the process until the oil level is within the recommended range. Once you’re done, securely replace the dipstick and the oil filler cap. Step 10: Close the Hood Finally, once you’ve ensured everything is in order, close the hood of your car. Make sure it’s securely latched before driving. Signs That Your Car Needs an Oil Change Regular oil checks are crucial, but knowing when to change your oil is equally important. Here are some signs that it might be time for an oil change: Dirty or Dark Oil: Fresh oil is amber and transparent. If the oil looks dark or messy, it’s time for a change. EntoNoise: If you hear knocking or rumbling noises from the engine, it might be due to insufficient lubrication. Oil Change Light: Many modern cars have an oil change light on the dashboard. If it lights up, it’s time for an oil change. Excessive Mileage: Follow your car manufacturer’s recommendation for oil change intervals, usually every 3,000 to 5,000 miles. Tips for Maintaining Proper Oil Levels Maintaining proper oil levels is key to your car’s health. Here are some additional tips: Regular Checks: Check your oil at least once a month. Use the Right Oil: Always

